The beauty of Elderflower // How to make elderflower cordial

IMG_4264.JPG

Written by Hackney Herbal trainee Amy.

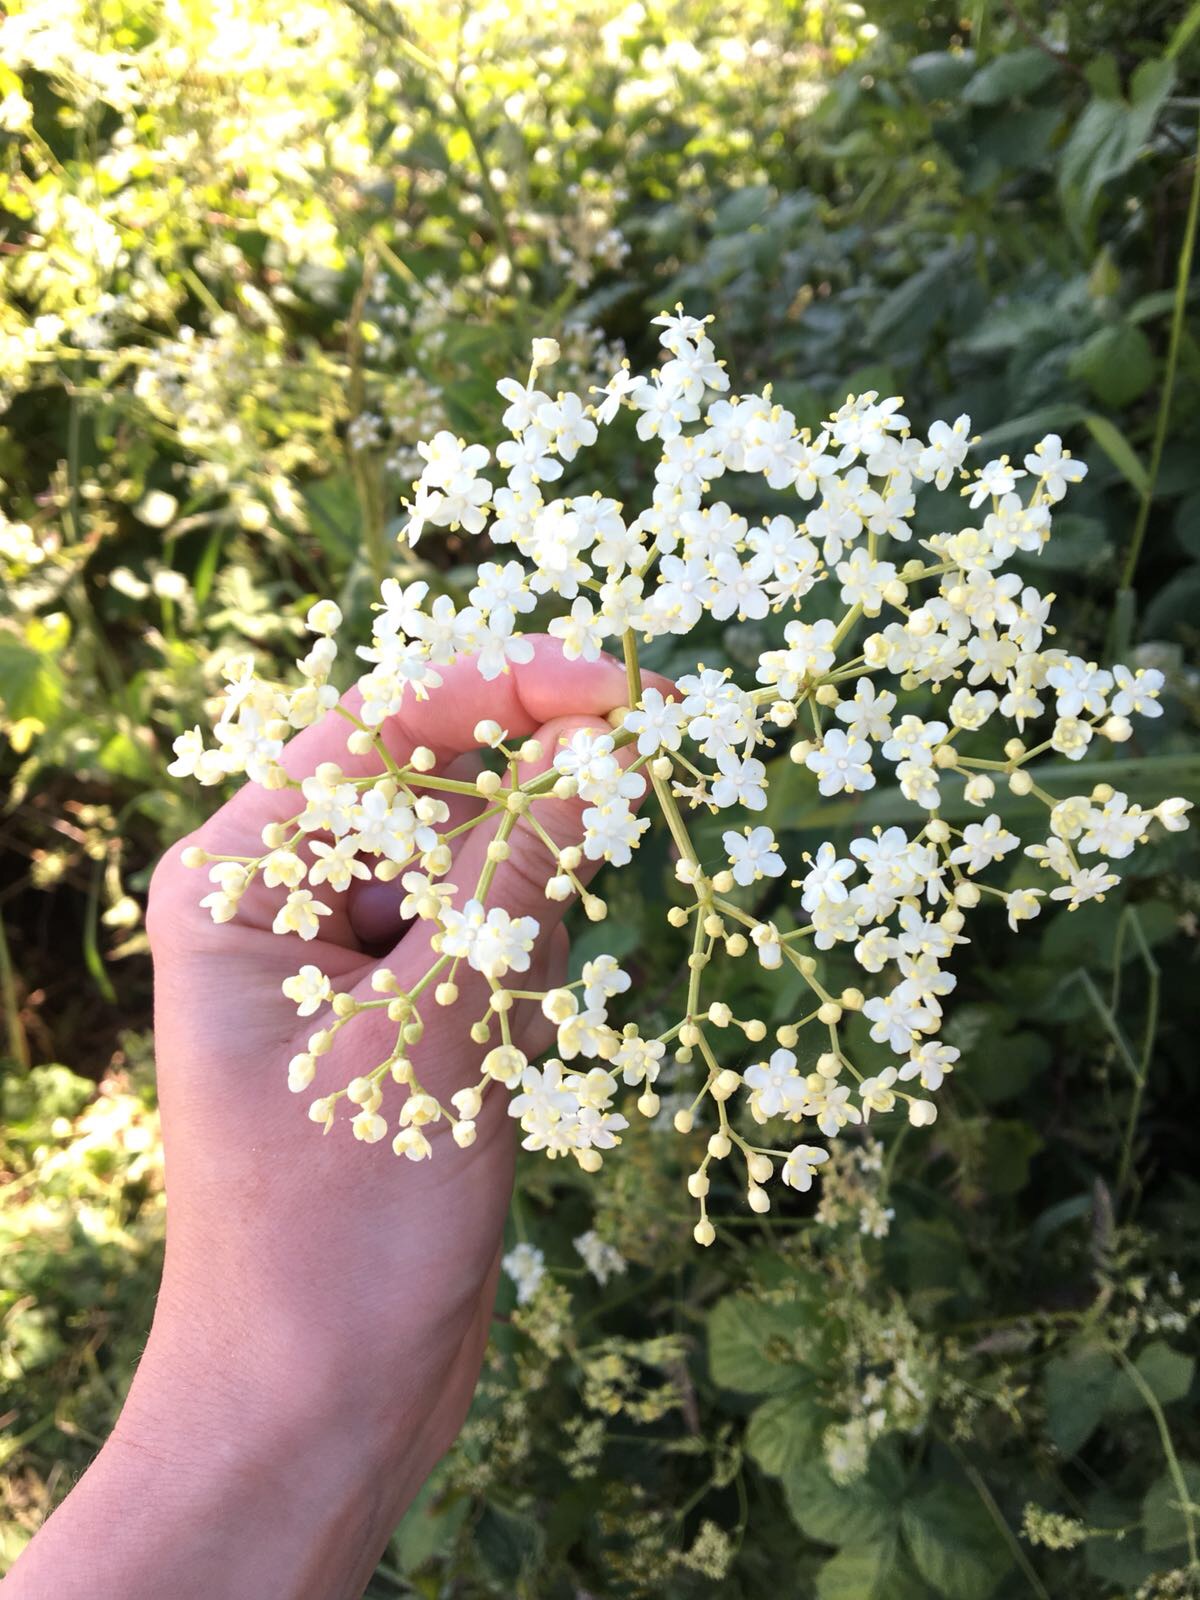
The blossoming of the Elder tree (Sambucus nigra) marks the beginning of summer. Elder's sweet white flowers come into bloom from late May and bring with them the promise of sunshine, long, warm evenings, abundance and harvest. Having been used for centuries, elderflower has a rich history in folklore and is still used by herbalists, foragers and plant lovers today. For us, making Elderflower cordial from this sacred tree is a celebration of all that has been in the dark of winter and all the warmth and light summer promises.

Native to the British Isles, Elderflower was once called The Queen of Herbs and The Elder Mother. It was said to be polite to ask her permission before cutting the tree down and was often hung above doors and planted around homes for protection. Traditionally all parts of the tree were used, from making furniture and dying clothes to treating inflammation, sickness, arthritis, insect bites and grief. It is said the famous physician Boerhaave didn't pass an Elder tree without tipping his hat to its many healing properties! Modern herbalists use its flowers in summer for hay fever and the berries in autumn and winter as protection against colds and flu and to support immunity (recipes to come!). The elder is a wonderful example of a plant that supports us with different properties as the seasons change and we become susceptible to different illnesses. 

For the next few weeks, a delicious aromatic cordial can be made from these beautiful flowers. It is easy to make and foraging for it along London's canals, parks and green spaces is an opportunity to notice the abundance of wilderness and nature around us. Pick the flower head in the morning on a dry day (preferably from higher up the tree where no animal or human has got to it!). Forage sustainably by only taking a small amount from each tree so there’s enough flowers to turn into berries in autumn and remember to ask its permission first! Happy and responsible foraging and let us know how you go on facebook and instagram.

IMG_4263.JPG

Recipe:

  • 25-30 elderflower heads
  • 1.5 litres boiling water
  • 600g caster sugar
  • 4 tablespoons of honey  
  • 3 unwaxed lemons
  • 2 unwaxed oranges
  • 40g citric acid (This is to help the cordial keep longer, I prefer not to use this and instead freeze it in ice cubes or plastic bottles and defrost anytime within a year)

To make:

  1. Gently wash off any bugs from your foraged elderflower heads

  2. Pour the boiling water into a large bowl or pan, add the sugar and stir until it dissolves and leave to cool

  3. Slice the lemons and oranges and put them into the sugary water

  4. Add citric acid if using

  5. Submerge all flowers head down into the water

  6. Leave in a cool place for 24 hours stirring once or twice

  7. Strain though a muslin cloth, tea towel or any clean cotton material and transfer to sterilised glass bottles or plastic bottles for the freezer

  8. Enjoy this delicious sweet cordial with ice, water or added to cocktails!  

 Words and images Amy Birtles.

Herb Highlight // Lemon balm

Botanical name: Melissa officinalis

Native to: S. Europe, Asia and North Africa. Naturalised in Britain.

IMG_0102.JPG

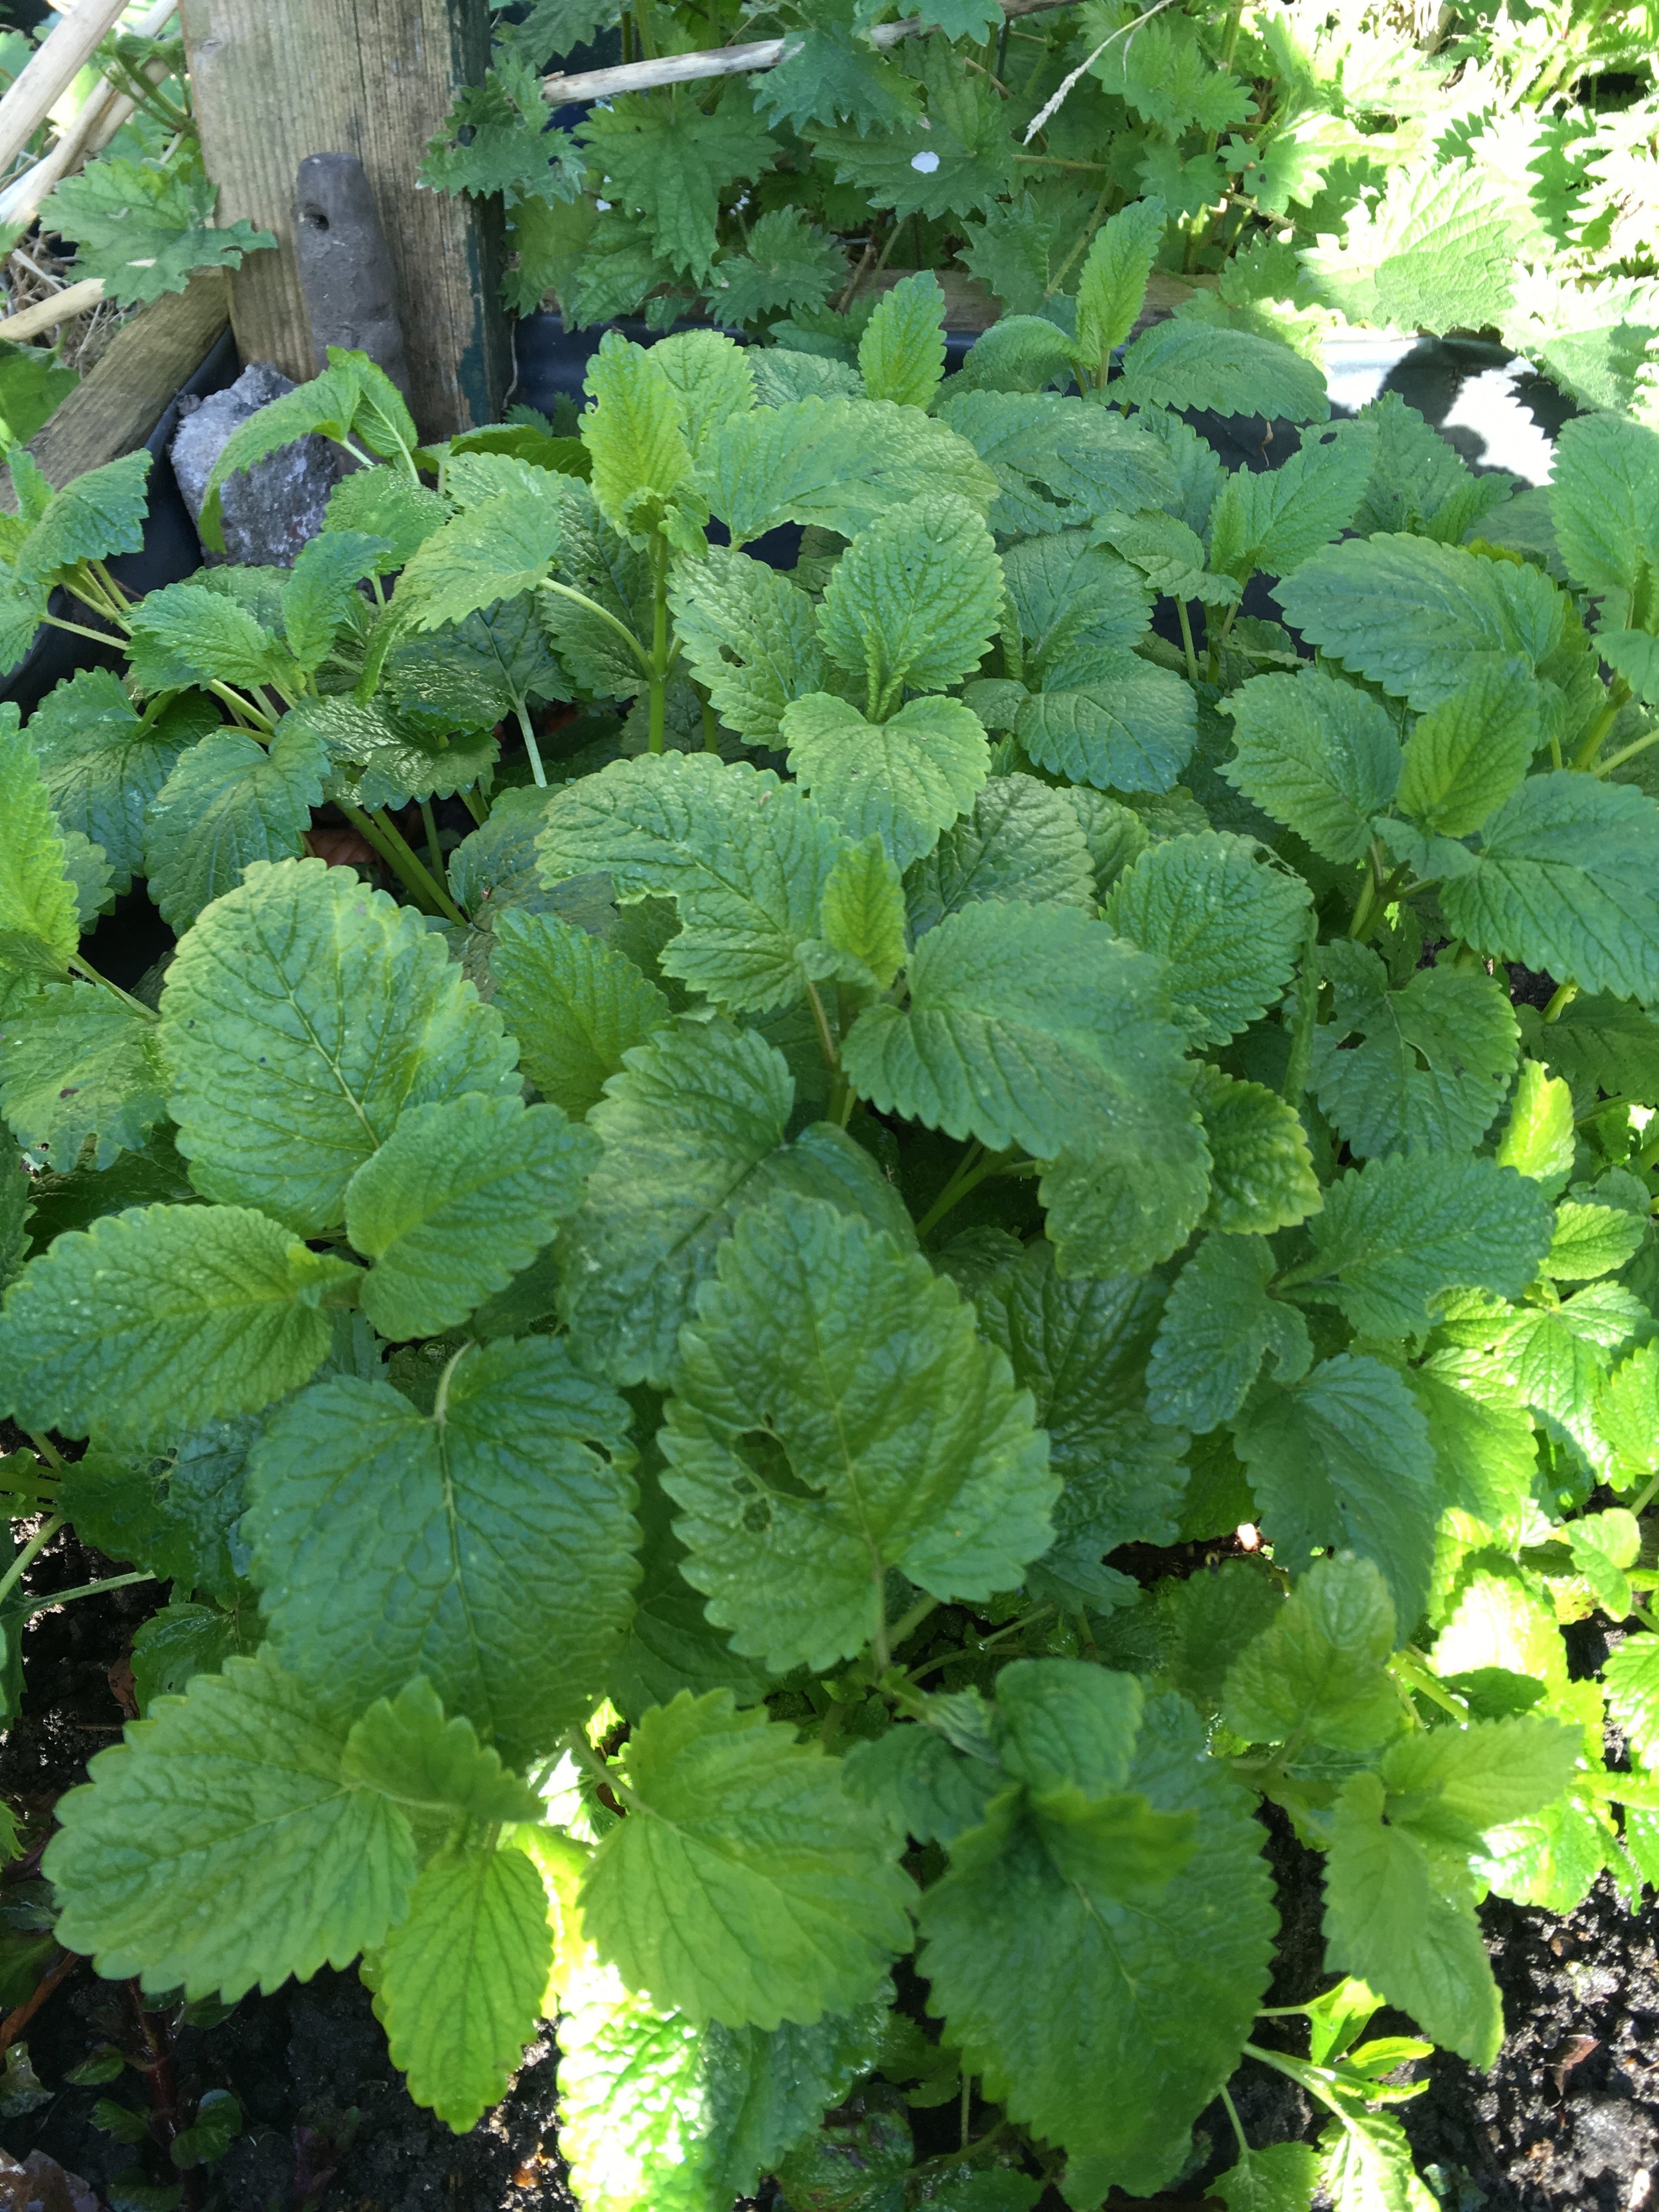
It's always a joy to see lemon balm springing back to life, a gentle reassurance that spring is definitely here! It is a herb that has always been associated with raising spirits and lifting the heart.The Arabian herbalist Avicenna (980-1037) said that Lemon balm "causeth the mind and heart to be merry". Recent research has shown that it can be an effective remedy for anxiety, depression and insomnia owing to its mild sedative properties. It's also a great herb for bees which go wild for its small white flowers and its botanical names is derived from the Greek word Melissa which means 'bee'. 

Our favourite way to enjoy lemon balm is in a hot infusion but you can also preserve it with honey or sugar to extend its short season. It can be enjoyed as a dried herb but it does lose some of its flavour during the drying process. Have a go at these simple recipes. 

Lemon balm honey

Fill a jam jar half full with fresh leaves and then fill with honey. Leave to infuse for 4 weeks and then strain. Use for deserts and cooking or have a spoonful in a cup of hot water with a slice of lemon. 

Lemon balm syrup

Dissolve 100g sugar with 100ml water in a saucepan on a low heat and then simmer lightly for 10 minutes. Turn off the heat and add in a generous handful of fresh leaves. Leave to infuse with the lid on the pan for a few house or overnight and then strain out the leaves. Use to sweeten drinks.

IMG_2002.JPG

Herb Highlight // Stinging Nettle

Botanical name: Urtica dioica

Native to: Europe, Asia, North Africa and North America

Nettles in september.jpg

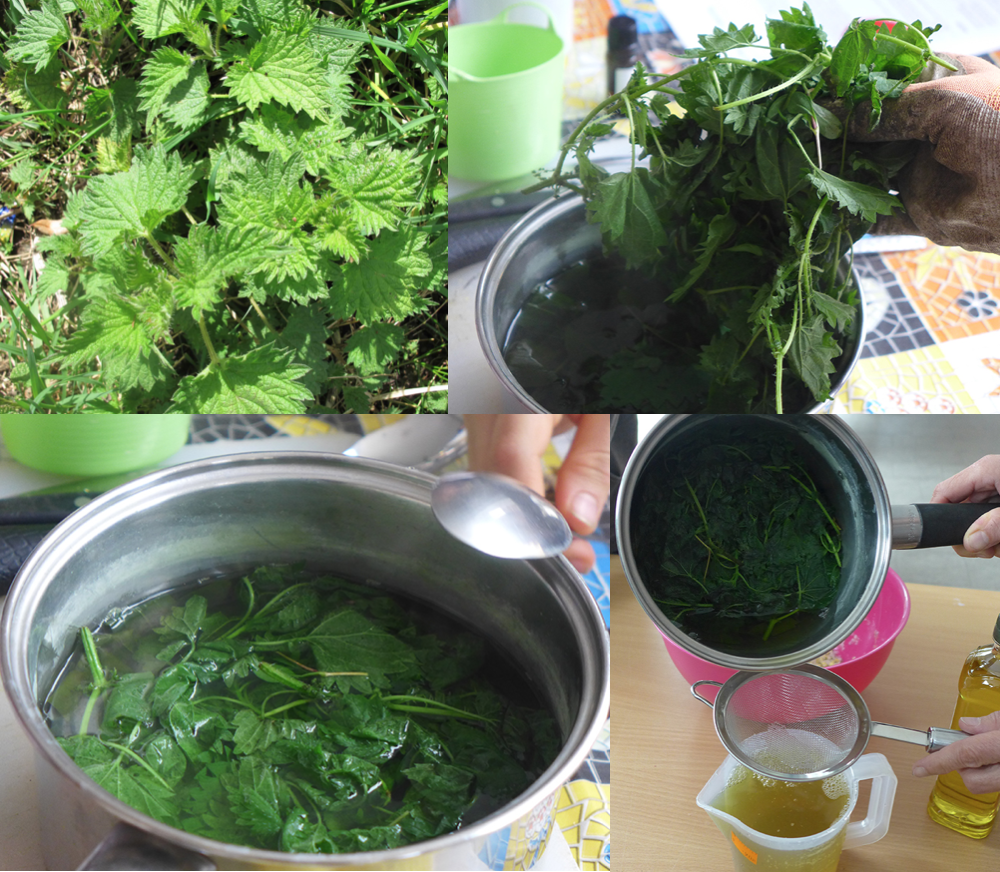
A wonderful wild herb that is abundant during the early spring. Sometimes a bit tricky to pick if you haven’t come prepared with long rubber gloves, but well worth the stings. Bursting with vitamins A & C, iron, potassium, manganese and calcium nettle makes for an excellent brew. Try it as a detoxing herbal infusion or add it into soups and stews (which takes away the sting) for an iron rich boost. It's also a good infusion to try for your skin and can be used to remedy  the symptoms of acne and eczema. Nettle grows wild so you can forage for it in woodlands, hedgerows and other people's gardens! Always pick the fresh leaves at the tip of healthy looking plants. Always remember to check the foraging guidelines for picking plants in public and private space. 

Nettle Hair Rinse  

You can use nettle to make a clarifying hair rinse to remove product build up in your hair, nourish your scalp and condition your hair. It's also suitable for itchy and irritated scalps and those with sensitive skin.

1. Pick a big handful of fresh nettle leaves - the fresh  tips are the best

2. It's always good to rinse herbs that your pick from publicly accessible spaces

3. Gently warm roughly 2 cups of water in a saucepan and throw in your nettles

4. Bring the heat up and simmer for 30 minutes

5. Allow to cool and then strain out the nettles

6. Use straight away by pouring over and brushing through wet hair

6. Rinse out

Nettle highlight.png

Herb Highlight // Pot Marigold

Botanical name: Calendula Officinalis
Native to: Southern Europe

Marigolds .jpg

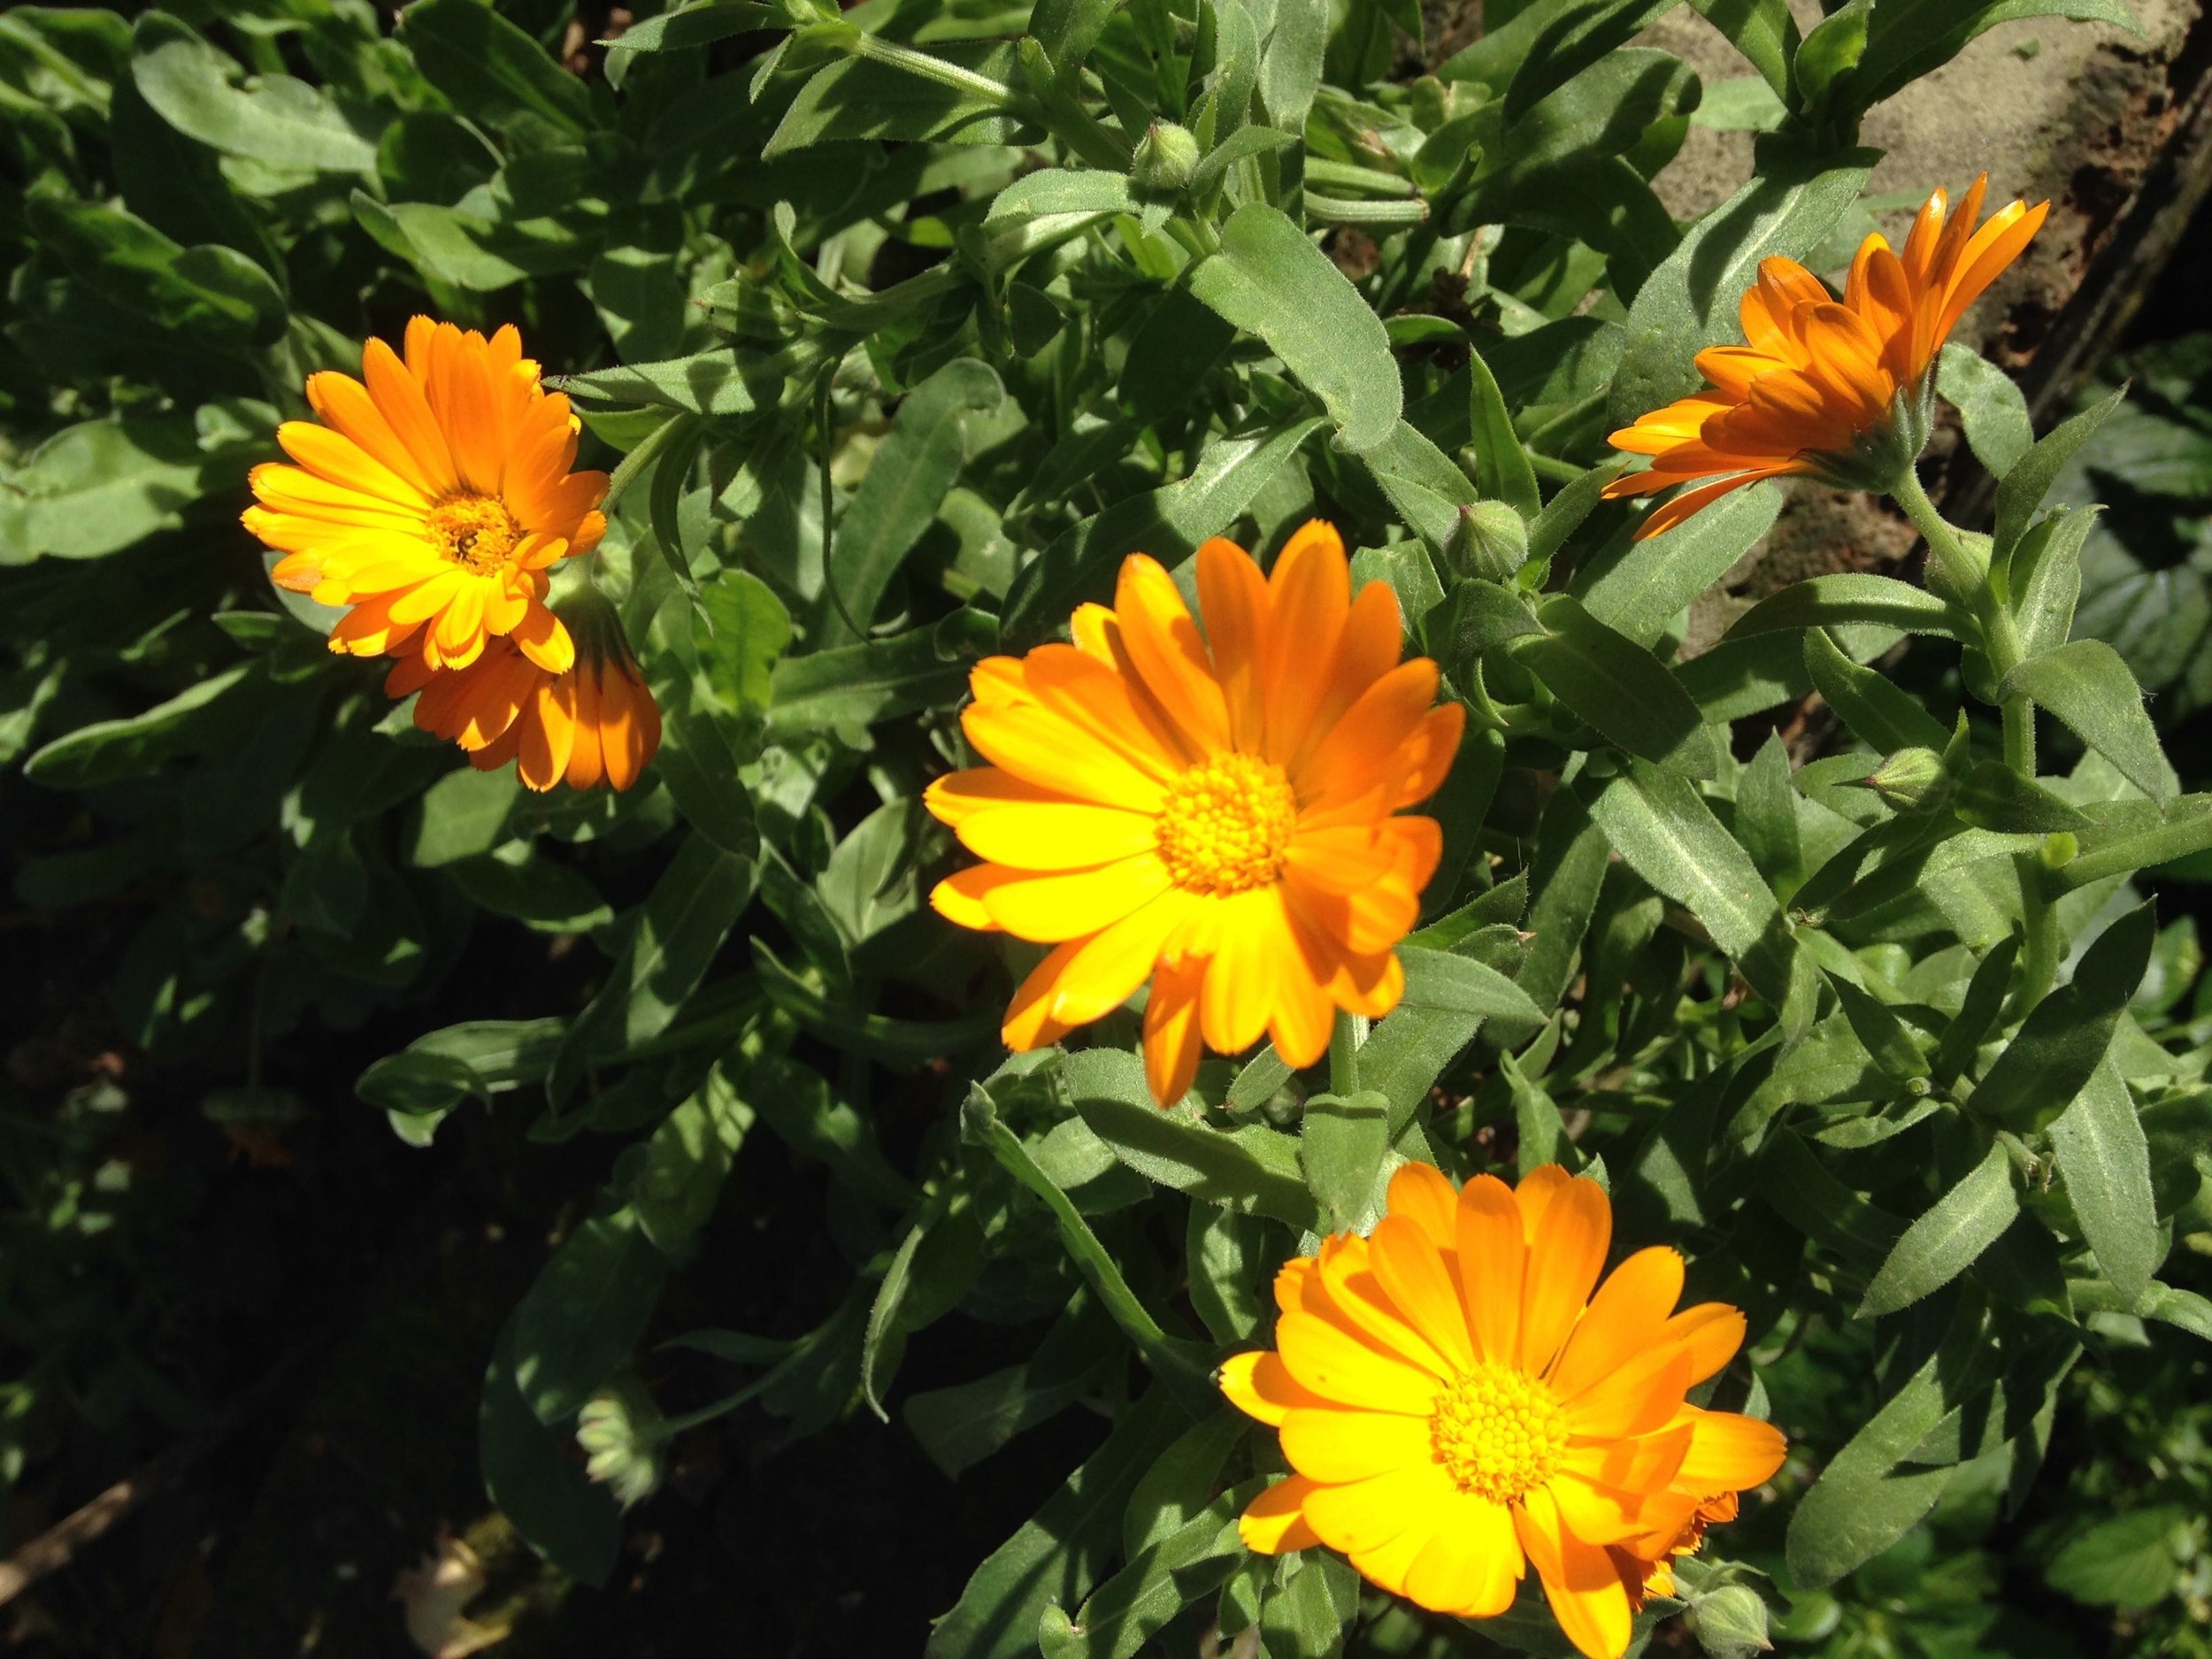
It's very easy to grow marigolds from seed. They grow happily outdoors either in a pot or in the ground and can also be grown indoors in a sunny spot next to a window. You can sow seeds outdoors in March or if you are keen to get going you can start them off indoors in February.

They are an annual plant - completing their life cycle in one year - and they drop plenty of seeds allowing new plants to grow in the next season. You can also collect some of the seeds at the end of summer to sow again the following year.
 
How to use


We mainly use our calendula to make an infused oil, the basis for all our herbal cosmetics. The flowers are rich in anti-oxidants (flavanoids) and these have a wonderful affect on protecting and restoring the skin. It is known as a vulnerary agent meaning it is useful for the healing of wounds. Calendula oil is very gentle and can be used to make creams and lotions to treat all sorts of skin complaints like eczema, stings and bites, psoriasis, scarring, stretch marks and nappy rash. Follow the guide below to make your oil which can be used directly on the skin or incorporated into another recipe.

To make an infused oil

1. Harvest marigold flowers in the morning on a dry day before they lose their volatile oils
2. Leave herbs to dry in a cool, dark place (away from direct sunlight) for 1-2 weeks to dry out
3. Pack the dried flowers loosely into a jam jar and cover with oil - sunflower, olive and almond oil all work well (about 15g herb to 100ml oil).
4. Leave on a sunny windowsill for 2 weeks to infuse
5. Strain out the flowers and store oil in a cool, dark place.

If you don't have a sunny windowsill you can also infuse your oil by placing herbs and oil in heat proof bowl set over simmering water. Heat for 30 minutes then leave to stand for 1 hour. Never let the oil boil.


IMG_7775.JPG
calendula in oil.JPG
IMG_3241.jpg

Herb Highlight // Thai Basil

IMG_5493.jpg

Botanical name: Ocimum Basilica

Other names: Anise basil, Liquorice basil

Native to: Southeast Asia

It's too early to be sowing seeds outdoors but Thai Basil is something that you can sow indoors every month of the year. So it's great for those of us with an itch to get sowing again. It's also a great herb for people without gardens because it will actually be much happier basking in the sun of a cosy sheltered windowsill than being outdoors against the perils of the English climate. Its fragrant leaves can also offer a good defence against flies and other indoor insect pests. You'll find seeds online if not at your local garden shop.

How to use

It is delicious raw in salads or can be added to stews, soups, curries and stir-fries. You might have added it to your phở (noodle soup) if you've been to a Vietnamese restaurant. If you can't grow it have a look for it in your local Asian supermarket. It slight aniseed scent makes a refreshing sweet tea (fresh or dried) and can be infused in sugar to make a syrup for drinks.

Thai Basil Pesto

  • 50g peanuts (lightly roasted)
  • Large bunch thai basil
  • 50g parmesan
  • 2 garlic cloves
  • 100ml olive oil
  • 1/2 lime (optional)

Blend the ingredients in a food processor until smooth and serve with a squeeze of lime for a citrus twist. Vegans can substitute the parmesan for a vegan cheese or leave it out, it still tastes great!

IMG_5780.jpg
IMG_6045.jpg

Capturing the colours of summer: harvesting and drying flowers

Pot marigold, Calendula officinalis

Pot marigold, Calendula officinalis

It's prime time herb harvesting at this point in the summer, so we thought we'd share with you some tips on harvesting and drying flowers. For a lot of herbs we cut the flowers from the plants without their stems, which means you can't hang them up to dry! So instead, we lay out flowers on drying racks or well ventilated surfaces. Read on for a guide on how to do this and some of our top tips. 

Floral roses - use a clean container to collect your flowers as you harvest them

Floral roses - use a clean container to collect your flowers as you harvest them

1. Harvest on a dry day in the morning, once any dew has evaporated 

2. Select the best looking flowers. Avoid ones that are already fading or have been eaten by insects.

3. Use sharp garden scissors or secateurs to remove flowers. Remember to prune back to a leaf on plants like roses and marigolds to keep them tidy and promote more flowers. 

4. While you harvest you can also deadhead flowers that have gone over and remove tarnished leaves to keep your plants in check. Compost these bits.

5. Once harvested, spread the flowers out on your drying surface. Ensure that they are nicely spread to allow good airflow to the flowers. It's ok if they overlap a bit, just avoid them being piled up on top of each other.

Laying flowers out to dry on sheets of muslin cloth

Laying flowers out to dry on sheets of muslin cloth

6. Dry away from direct sunlight as this will deteriorate the flowers and encourage volatile oils (which hold a lot of herbal goodness) to evaporate and be lost.

7. Check on your flowers every few days and gently turn them to ensure air is reaching all parts of the leaves.

Vibrant colours of dried Rose petals; bright colours imply a good quality dried herb

Vibrant colours of dried Rose petals; bright colours imply a good quality dried herb

You know that the flowers are ready if they crumble easily. If you are drying flowers or herbs for the first time it's a good idea to experiment with different areas in your home to find where the driest and best ventilated areas are!  Once they are dry you can store them in an airtight container, in a cupboard where there is no chance of them being in contact with moisture. Brown paper bags inside airtight containers or recycled jam jars work well.

Happy harvesting!

Psst. If you need some help with growing herbs or want to get started come along to our next workshop, City Gardening: Growing your own herbs on Thursday 27th July at the Bee Garden in Dalston.  

WINNING! CSR Awards

Last week we were at the National Corporate Social Responsibility Awards and are so chuffed to have received the Special Judges' Award for Grass Roots Communities! It was a wonderful night celebrating some great achievements and meeting the folks behind some great initiatives. We gave special thanks to Hackney City Farm for giving us the space and support to grow our herbs, Tiosk for being the first cafe to stock us and the Centre for Better Health for welcoming us into their community hub to run our Herbal Craft Course. We couldn't have done it without all of you! And a final thank you to ALL our volunteers with a special mention to our wonderful 2016 trainees, Oli and Fran.

Congratulations also go to our friends at Project Dirt for winning Best Education Project for Outdoor Classroom Day in partnership with Unilever and also to Bromley-by-Bow centre for winning for Best Community Legacy Project for their Beyond Business scheme in partnership with Investec. 

You can see all the winners here or by following the #GlobalGood posts on social media.

Wild herbs: taking notice this Spring

Spring seems to have snuck up on us this year, its sudden arrival marked by pink blossoms perching delicately on the ends of tree branches, as if they landed there overnight. And with them comes the happy reminder that everything passes – sometimes, it seems, in the blink of an eye! The appearance of spring’s subtle flowery scent on the breeze, and its dashes of warming sunshine which hold the promise of summer, are a nudging reminder to take notice of what’s going on around us. We’ve often been so busy filling up our calendars with our resolutions, plans and promises for the New Year that taking notice of these subtle but definite changes might have become a bit of a back seat passenger. It’s important to make space for taking notice, as it’s often within this space that insights, wisdom, ideas and creativity can emerge. In the spirit of this, we’ve come up with the perfect way for you to create space to take notice, and enjoy the gifts that spring carries with it.

Now the weather is milder, and plants are starting to unfurl, it’s a great opportunity to take your basket and boots out for a riverside stomp and clear away the cobwebs. Grab your map and plan a route that takes you along canal and riverbanks, or through areas of rich biodiversity. On your way, see which herbs you notice emerging. Make sure you bring your guide for identifying plants, some secateurs and a hot thermos of your favourite herb blend in case it gets chilly.

It’s the perfect time to look out for young stinging nettles, which are abundant in nutrients. Infuse these in some hot water and you’ve got the perfect fuel for your spring creations to come to life! Another plant to spot is early wild garlic, perfect for salads and making wild garlic pesto. Spread it on toast or add to pasta dishes for a garlicky, immunity-boosting kick (be careful, it’s potent stuff!) We like this recipe from the Permaculture magazine website. Cleavers (also known as goose grass) are also plentiful at this time. They help to remove toxins from the body and are very easy to spot – they’ll probably stick to your clothes en route, too so no need to pick! So get those wellies and waterproofs on, take some photos of your findings and share them with us @hackneyherbal – we’d love to see what you unearth.

Happy foraging!

Here is a guide for identifying our favourite three spring time herbs and some ideas for eating, juicing, brewing and stewing these nutricious wild herbs.

1. EAT

Wild garlic (ramsons) Allium ursinum

We like picking the leaves of these and adding them to salads or sandwiches for a nice hearty garlic kick. It’s packed with allicin which is antibacterial and antimicrobial, perfect for beating off those pre-spring colds.

2. JUICE

Cleavers (sticky weed, sticky willy, goose grass) Galium aparine

Abundant at this time of year and recognisable by its sticky character cleavers are best enjoyed in their fresh state. Add them to your water bottle to cold infuse or even better wiz them up in a blender for a juice that will help your lymphatic system,  aiding your body with the removal of toxins.

3. BREW of STEW

Stinging nettle Urtica dioica

Sometimes a bit tricky to pick if you haven’t come prepared with rubber gloves but well worth the stings. Bursting with vitamins A & C, iron, potassium, manganese and calcium nettle makes for an excellent brew. Try it as a herbal infusion or add it into soups and stews (which takes away the sting) for an iron rich boost.

Remember to always carefully identify wild plants before consumption using a foraging guide if you are a beginner. Also be mindful of foraging regulations in your area and never dig up a plant from its local habitat without permission. More useful tips here.

Tea making kit: Our top 5!

As herb growing enthusiasts we know that the most important aspect of making the best cup of herbal tea is the herbs themselves. However, the experience can only be improved with the right choice of equipment. To beat off the January blues we treated ourselves to a range of new tea making paraphernalia and have spent the last month testing out our new pieces. Here are our top five. So put the kettle on and get brewing!

1. STUMP TEAPOT by Forlife

A great teapot for brewing up a loose leaf blend as it comes with its own infuser. A good size for two people sharing or for those times when you need a whole pot to yourself! It comes in lots of nice colours and the design is cleverly stackable if you are buying a few. £28, available in-store and online at Whittard

2. INFUSER by Ipow

A handy infuser for brewing a loose blend straight in your mug. It has a handle that sits on your mug rim. Really easy to use and keep clean with a lid that doubles up as a stand to avoid drips and spills. We love using these for testing out new tea blends and also in our Herbal Tea Blending Workshops (hint! *next class 16th March*). £7.50, available at Tea Geeks

3. NAGIIRA TEA STRAINER from Tea in the City

Designed and made in Japan, this beautiful tea strainer is one of a kind. Its double layer mesh works perfectly to strain your tea blend and the design allows it to rest happily on your mug without toppling. The Japanese factory only made a small batch of these so get one quick before they all go. £15, available at Tea in the City

4. RE-FILLABLE TEABAGS by Spice.boutique

We've tried out a few re-fillable teabags and these are by far our favourites. Made from unbleached filter paper they are easy to fill and tie and are fully compostable after use. A good piece of kit if you want to have some teabags made up for grabbing on the go or to make gifts for friends. They come in two sizes - cup and teapot. £4.20 for 100 available online.  

5. FACETED CLIP TOP JARS by Kilner

We recently bought a set of these clip top jars for displaying our herbal blends when we do pop-up events. They are a good way to store either your loose leaf blends or teabags as their airtight seal keeps everything nice and fresh. You can find them in most kitchenware stores or online at Sainsbury's.